|
Interaction Client Web Edition Help |
If the ACD-routed email message you received was formatted using HTML, you have the option of using text formatting tools in your email reply. You can also embed an image or include a hyperlink in your reply. In every other way, replying to an HTML email message is the same as replying to a plain text email message.
The HTML version of the Email Window for Outgoing Messages includes a text formatting toolbar. You can point to any toolbar button to display a tooltip containing the name of the button.

1 |
Font |
Use the font controls to bold, underline or italicize selected text. You can also select text color, font and size. Note: You can define a custom text color. This custom color is saved for future HTML email replies. |
2 |
Text Indent |
Use text indent controls to increase or decrease the space between the selected text and the left margin. |
3 |
Paragraph |
Use the paragraph controls to set left, right and center text alignment. You can also create bulleted or numbered lists. |
4 |
Hyperlink |
Use the hyperlink control to create a working hyperlink in your email response. |
5 |
Image |
Use the Image control to insert a picture in your email response. |
You can include a working hyperlink to a webpage in your email reply. Or you can create a link that automatically generates an addressed email message in the recipient’s default email program.
To create a link to a webpage:
Do one of the following:
Select the text you want to display as the hyperlink and click the Link toolbar button.
Click the Link toolbar button.
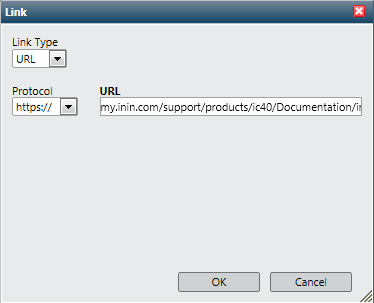
In the Link dialog box, in Link Type, select URL.
In Protocol, select http or https, as appropriate.

Click OK.
Result: This creates a clickable link in your email message that automatically opens a web browser to the selected address.
To create a link that generates an email message:
Select the text you want to use as a link and then click the Link toolbar button.
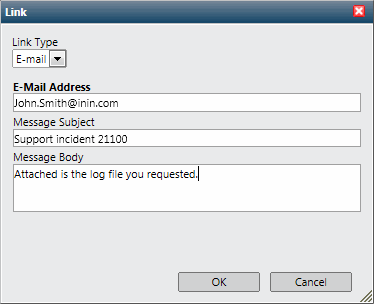
In the Link dialog box, in Link Type, select Email.
In E-Mail Address, type the address where you want the email message to be sent.
In Message Subject, type a subject that identifies the content or purpose of the email message.
In Message Body, type any text needed to further explain the content or purpose of this message.

Click OK.
Result: This creates a clickable link that generates an addressed email message in the default email program on the recipient’s system.
To insert an image:
Place your cursor in the email reply at the point where you want the image to appear.
Click the Select an image to insert toolbar button.
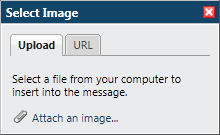
Result: The Select Image dialog box appears.

Do one of the following:
Select the Upload tab and click Attach an image. Locate an image on your workstation and click Open.
Select the URL tab. In the text box, type the URL for the image and click Insert.
Result: The selected image appears in the email reply message.
Related Topics